Pgrm - a Microprocessor and Eprom Programmer
Overview
Pgrm is a GTK based program for the host part of an eprom, microprocessor programming system. It uses the parallel port or a serial line to communicate with the programmer, see [1], with a protocol heavily inspired from the Atmel STK500 Communication Protocol. It is designed to be easily expendable, adding a new component is just a matter of adding data in tables, this because the algorithm part is located in the programmer itself.
Features
Here are the main features:
- All programming functions directly accessible in one panel
- Devices can be: Eproms eeproms, mcs51, mcs48, Avr, pics see [1] for details.
- Parallel programming mode
- Serial programming mode
- Two main buffers for flash and eeprom of AVR's
- Hex editor included
- Terminal included for design testing
- Boot loading facility through serial port, while design testing
- Parallel port communication with ppdev, parport kernel drivers, without need of root access.
- Standard serial port communication.
- Usb serial comms are managed like standard serial ports.
- Serpp driver for avr serial programming on parallel port.
- Dynamic device configuration files.
- Crc 32 implementation.
- A tcp/ip driver lets send programming commands to serial proxy on the network.
Description
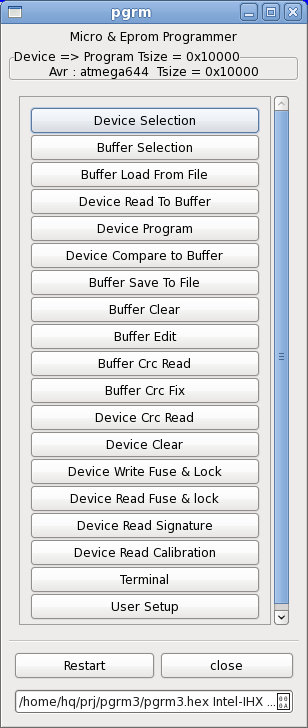
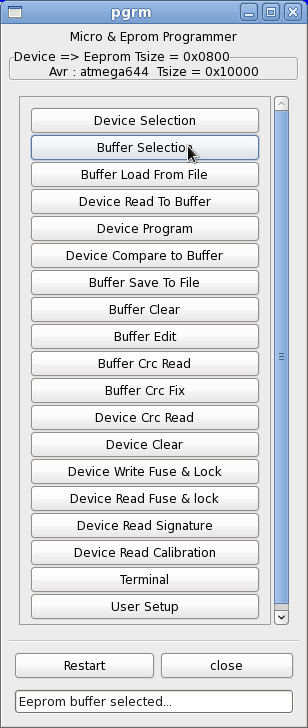
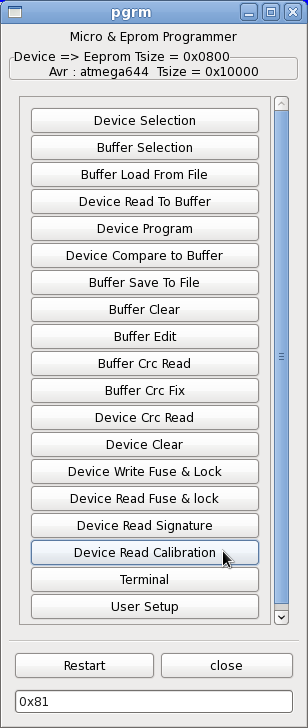
This picture is the main menu of the program, you get it when you start it. The first action the user has to do is to select one device to program. But this can be done automatically to save mouse clicks and is described in user setup. The device is set to Avr:atmega644 and a program is loaded in the buffer. The next picture shows the device selection menu.
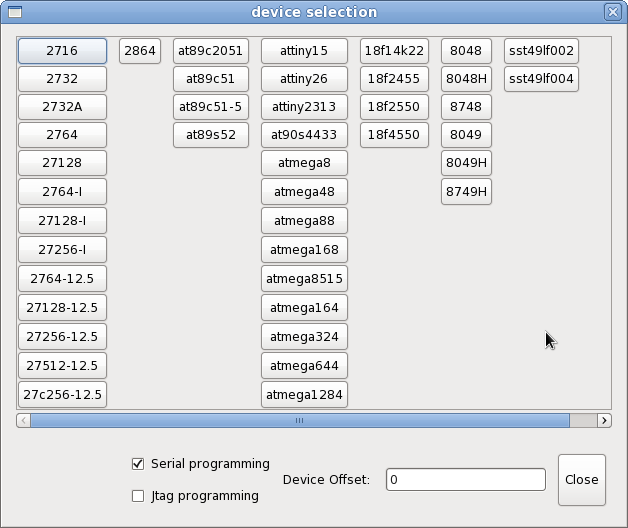
At start up, the program tries to connect to the programmer first through the parallel port, and if it does not succeed through the serial port.


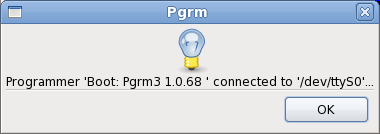
This next display shows a serial connection to a boot loader on a target system named "Pgrm3". This means that the program Pgrm is ready to talk, through serial port, to an In-System Programming by On-chip Boot Program. The operating mode is identical to what is described below, but some functions cannot be inplemented in this mode. See the page [2] for details.
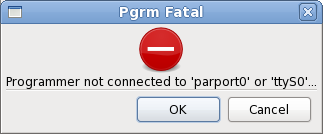
This next display shows a connection failure. There may be several reasons to this. One specific is the bootloader being already running, and in this case, the reset of the target is necessary. Clicking Cancel exit pgrm. If you click Ok, pgrm continues. If you get an answer to the read signature command, the bootloader is running. Reset the target anyway.
At this point, it is a good idea to read the signature for devices that have one. A bad signature could be a sign of bad insertion in socket or simply a bad device. Remember that reading a signature does not setup pgrm at all. You must have selected the right device before reading a signature !!!.
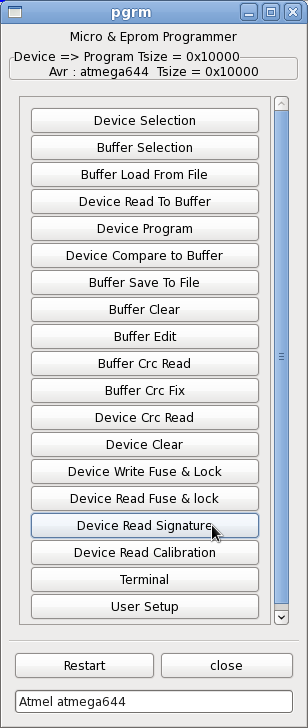
Some devices need to be cleared before programming. This means, of course, electically erasing. Just click the Device Clear button. This command does not work in bootloader mode, but there is no need to clear the device in this case. Erasing is done when programming for flash and eeprom.
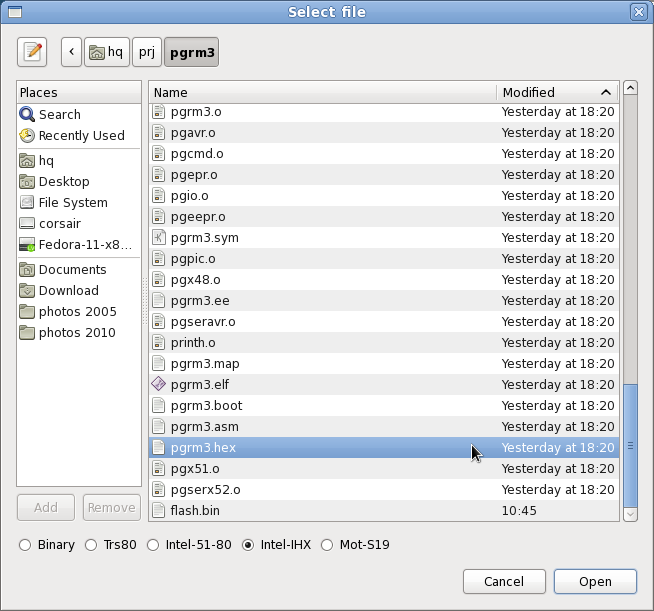
At the first and at some other time, we want to load a file containing the program into the internal selected buffer. At this point, it is a good idea to Clear Buffer, unless you want to add the file to the buffer. Clicking Buffer Load From File will show this menu. Select your file and click OK, after selecting the file format.
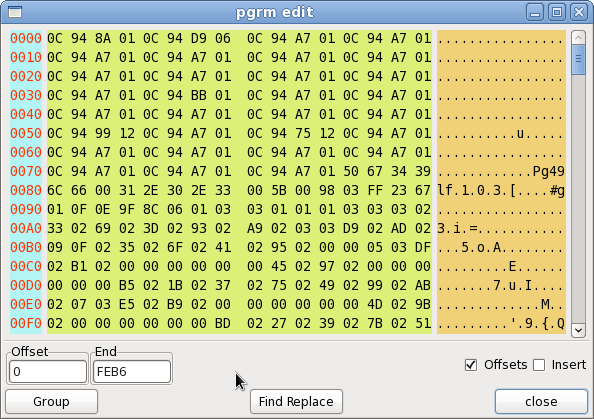
As you are experimenting, you can trigger the Buffer Edit button. This gives a view of what is loaded in the buffer. Of course, this is an unnecessary step in the programming process, unless you know what you are doing.
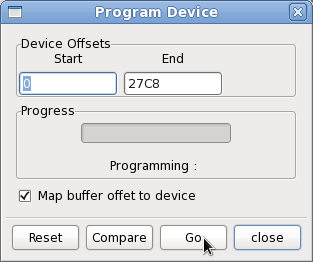
We are now ready to program the device. Click the Program Device button and Go button. In the first phase, the programmer checks if the device is blank (all bytes/words to 0xff) et then does the programming. Tis is true if you are not in front of the bootloader. If you are running the bootloader, programming is immediately started and the reset button is displayed. You reset the target, when all programming operations are finished.
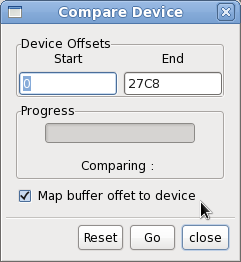
The device is programmed. Do you want to check it ? Cick Device Compare to Buffer and Go button.
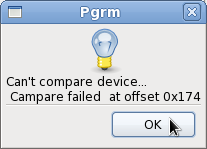
This message is displayed when compare fails. There is no message if compare succeed.
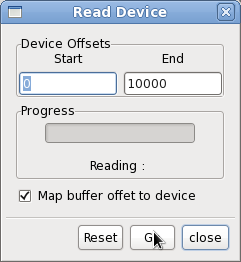
Sometimes it is usefull to read the memory of the device and store it in a file. The Buffer Save to File button provides a similar file selection dialog as seen in Buffer Load From File.
Ok, it is done for the program memory. Now, let's program the avr's eeprom The only thing to do is to trigger Buffer Selection button and load a file corresponding to the eeprom contents in the buffer, and program.
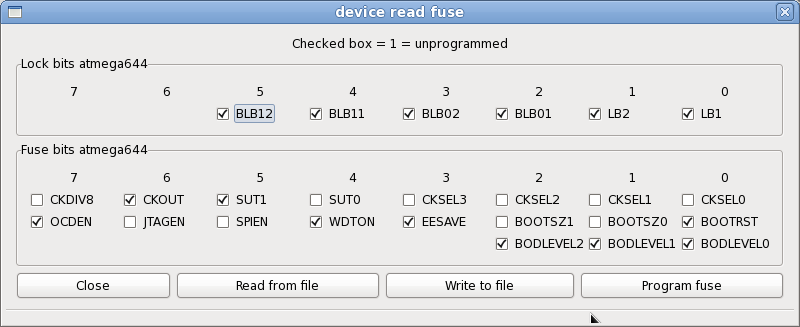
On an Avr, we can do some more : read and write the fuse and lock bits. Fuses must be set up for each new device, defining things like clock circuit, watchdog,... They work in an analog way to environnemnt variables in Unix world. But they can be different from device to device, so the unique way to deal with is to read the specific datasheet. The application fuse lock configuration can saved to and retreived from file.
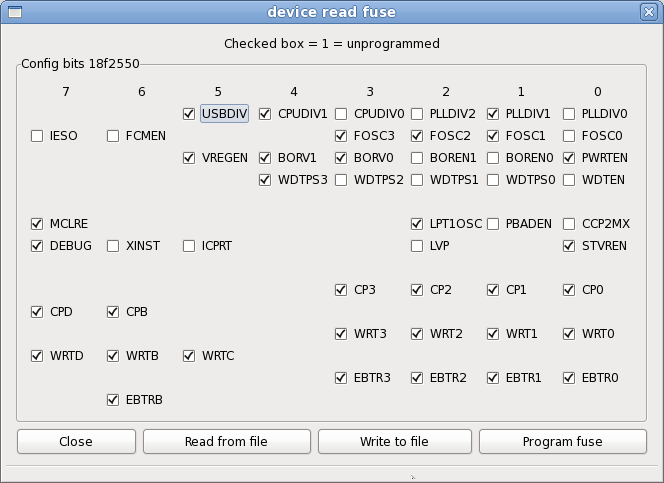
That it is Ok, but PICs have not fuses, they have configuration bits. In pgrm, fuses or configuration bits use the same objects, it is just a naming problem.
In Avrs, you can, as well, read the calibration bytes. Atmega644 as only 1 byte.
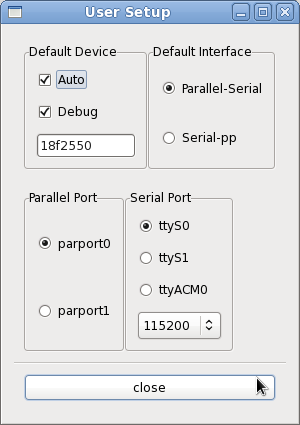
The User Setup button lets you select some settings. If the Auto is checked, the program remembers the previously selected device and the previously loaded file. At the next restart, they will be respectively selected and loaded. The ttyACM0 is an USB dynamic device. It is only present when the interface is connected and it must be connected before running pgrm.
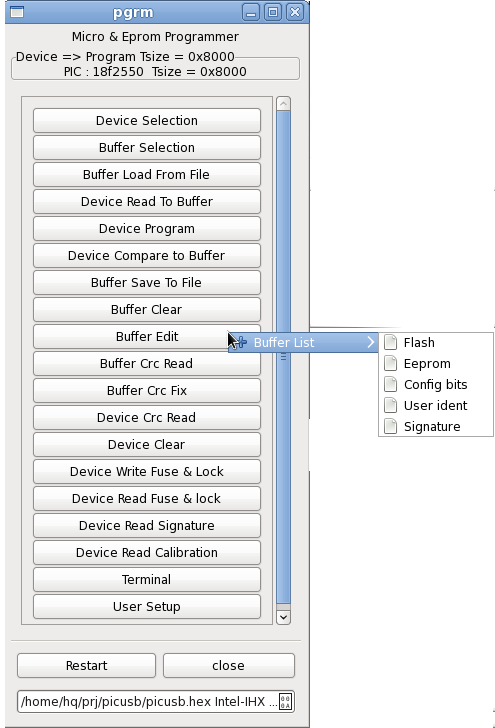
It is possible to access all buffers for editing by clicking right on the Buffer edit button. This open the edit window for the selected buffer.
Serial proxy
With help of a serial proxy, like nbtirelay, pgrm can program and access, in boot mode, a microprocessor on a board connected with its serial line to a router, for example, instead of being physically connected to the machine running it.
More on fuse and config bits
Fuse and config bits are now saved to file in 2 forms : the previous pgrm form as a C comment style and a C program form for AVR in a file named by default fuse.c or an Gputils assembler form for PIC in a file named by default config.inc.
Adding your fuse or config file to your makefile will result in embedding the fuse / config description in the target hex file. As the first thing that pgrm do is to read the hex file, fuse / config description bits are loaded in the internal buffer, ready for sending to the device.
As you can see, you can fill the fuse.c / config.inc file by hands or use use the fuse / config window to set the fuse / config bits and ask pgrm to write then in the file for you.
Note: this works for avr-gcc + avr-libc for AVR and SDCC + gputils for PIC. And is not tested for others tools.
Crc 32 implementation
Pgrm let you to compute the crc32 value of the buffer and crc32 value of the memory in the device.
Pgrm let you to fix the crc32 value of the buffer to zero and position where the computed value is written in the buffer. The resultant crc value will be 0. The default position is end of buffer - 4. The position can be set by setting the variable crcPosition of the device section in the configuration files.
crcPosition = 0x1234
Usb serial comms
Usb serial comm devices can be used to communicate to the programmer or to your board. As these devices are dynamic, pgrm needs to search for them in the /dev directory at startup. "ttyACM*" and "ttyUSB*" are searched and presented in the User setup / serial port menu.
The serpp driver
The serpp driver is an answer at the question : how can I start programming without a programmer with pgrm ? and is described on this page Parallel port serial programming driver.
Terminal
The terminal has no direct relation with the programming process. But provides a convenient way to access and control a target system in the debugging phase on the same connection. You need just to click the Terminal button after programming in Boot mode.
If the debugging functions are implemented on the target, it is possible to read or modify variables on the target from the terminal with using symbolic names. For example to display the value of the verbose variable, just type d verbose in the small command window at the bottom of the terminal window. Values are taken from $(PROJECT).sym file created at compilation time by an utility mkavrsym or mkpicsym from the $(PROJECT).map created by linker. Please, Look at one of my project Makefile to see how to use it.
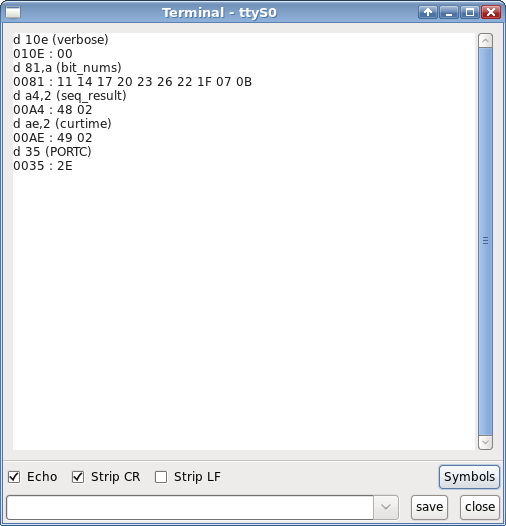
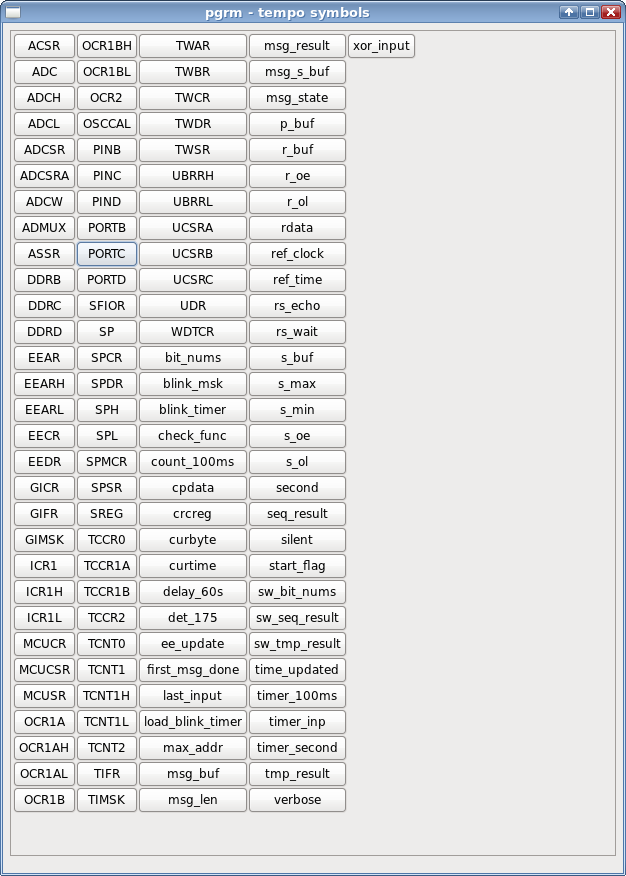
Clicking the symbols button in the terminal window open a new window filled with buttons labeled to your application symbols. A left click on one of these buttons, send the command to the target and results are displayed in the terminal window. A middle click will the send the text to entry of the the terminal window for more editing.
Tools
The software is developed on a Linux system with GNU gcc Compiler and use the GTK2+ library. Here is the list of tools:
- gcc compiler.
- flex the fast lexical analyser generator.
- bison - GNU Project parser generator.
- Gtk+2 libs and headers.
Compiling the software and Installation.
You need to have the tools installed, and next run the following commands.
tar zxvf pgrm-yyyymmdd.tar.gz
cd pgrm-yyyymmdd
make

make install
The make install command copy pgrm to $HOME/bin and copy the configuration files from directory conf to $HOME/.pgrm
The main configuration file is pgrmrc in $HOME/.pgrm but if pgrm find a pgrmrc in the current directory, it will be used instead of the one in $HOME/.pgrm. Just make the included files to point to $HOME/.pgrm. This a way to make the pgrmrc project dependant.
Configuration files
The device parameters are now stored in a text configuration file instead of a source program file. This lets the user to define his own devices. But you should be aware of that may be not enough in every case. If the programming algorithm is not defined in the other side, you could not program !!!.
To understand, the better way is to look at the given examples in the conf directory and to read the text document doc/config.txt and the README file for install.
Document references
- part 2 : programmer part of the programming system.
- A Pic or Avr bootloader program.
- Parallel port serial programming driver.
- PC Bios flash memory programming.
LICENSE
The Pgrm software is licensed under the terms of the GNU General Public License as published by the Free Software Foundation. See the file "COPYING" in the "Pgrm" directory.